Cloudflare integration in the Control Panel

For a long time, using a Cloudflare-managed domain with Tierra Hosting was possible, but required all DNS and domain settings management to be carried out from Cloudflare's website.
As of today, this is no longer necessary, as we have created native Cloudflare integration in the Control Panel.
You can now manage all DNS operations and the most popular domain settings from just one place.
How to set up a domain with Cloudflare in the Control Panel?
In order to use Cloudflare, you need to sign up for one of their plans and update your NS servers the ones they will provide you with. This means that they will now resolve your domain.
The next step is to create an API token. This is done from the following address: https://dash.cloudflare.com/profile/api-tokens.
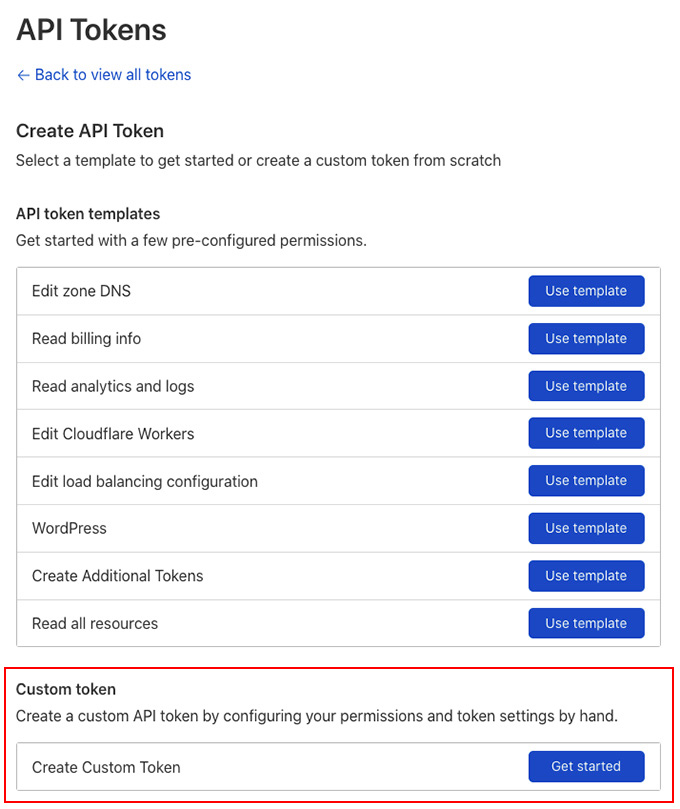
Your API token needs to be a custom one, with the following permissions:
- Zone -> Zone -> Edit
- Zone -> Cache Purge -> Purge
- Zone -> DNS -> Edit
- Zone -> Zone Settings -> Edit
- User -> User Details -> Read
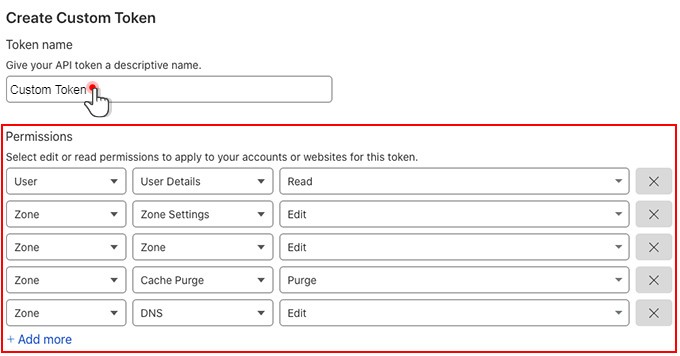
Note: if you don't enable the required permissions, some features will not function properly.
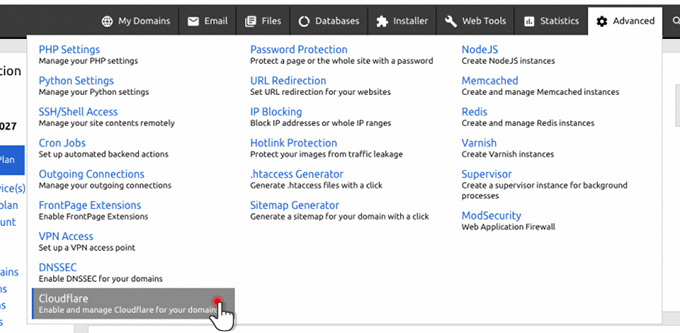
Once you have your API token, you can head to the Control Panel. You will find the Cloudflare section in the Advanced menu.
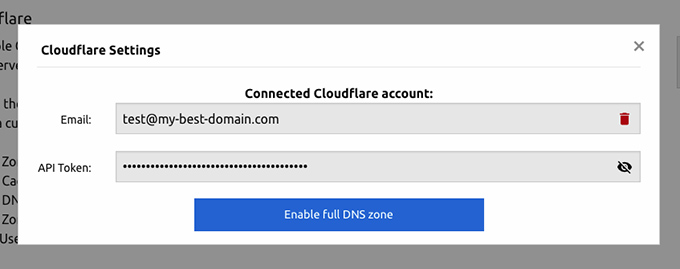
Inside, click on the Cloudflare icon to enter the newly generated API token and click on the “Enable full DNS zone” button.
That’s it, you can now manage your Cloudflare domain through the Control Panel.
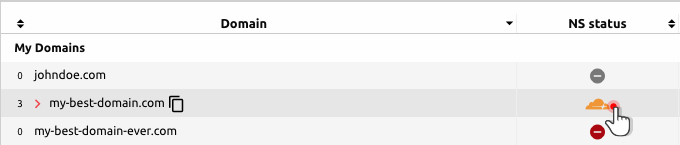
If you have Cloudflare enabled for a domain through the control panel, this will also be reflected in the Hosted Domains section:
Aside from DNS controls like adding new records and modifying existing ones, you will also have quick access to some of the most popular Cloudflare Domain Settings, like Always Online, Caching level, Security Level, Minify, Rocket Loader, and more.
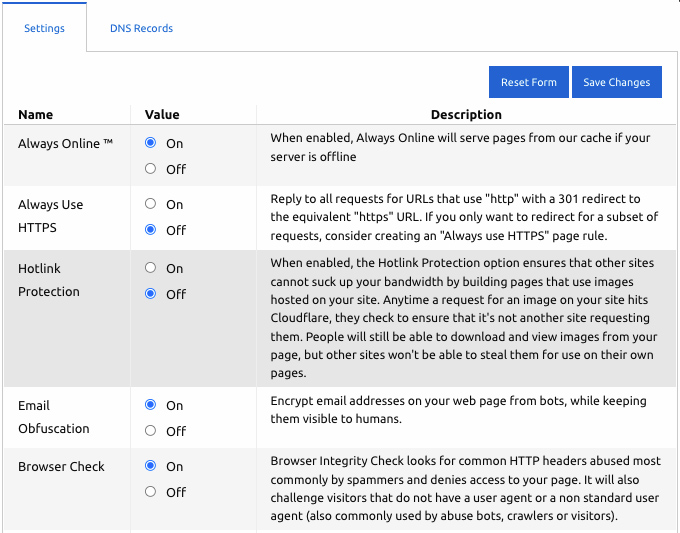
Note: we don’t store any settings locally. If you make a change directly with Cloudflare, it will also be reflected in the Control Panel.
Share Link: https://thost.link/3B054xu
Hepsia Control Panel
 Take a peek at the live demo and take a look at our tools we give you to control your sites.
Web Accelerators

Improve your site's speed with the assistance of our in-built tools.
1-click Installer
Install more than 50 popular site apps with a single click.